As far as a TLDR goes, Auto Deploy is a VMware feature that allows taking a bare metal host, PXE booting into ESXi, applying configuration and bringing it, as a working, fully configured host; into an existing environment. Pretty neat. If that doesn’t convince you, it’s also the basis for a lot of study material in the DCV certification track.
Required components
First up, we need to ensure two vCenter services are enabled and set to start with the vCSA (you are using a vCSA right?) As far as I can tell, this is only possible in the old Flex web client (boooo).
Head to home > Administration > System Configuration > Services. Ensure both Auto Deploy and ImageBuilder Service are enabled and have the start type of Automatic. The start up type can be changed under Actions > Edit Startup Type. You’ll need to log out and back into to vCenter if either service was not running.
Next up, we need to download the Network Bootstrap Program or NBP. This will later be uploaded to a TFTP server and help point the bare metal host to it’s destiny. This and all future configuration can be done in the HTML5 client (yaaay).
Head to Menu > Auto Deploy > Configure > Download TFTP Zip File. Extract all files and grab undionly.kpxe.vmw-hardwired (the NBP) and tramp. Symtoms of forgetting tramp may include head scratching and/or mumbling four letter expletives.
Upload undionly.kpxe.vmw-hardwired and tramp to your TFTP server. You’re on your own for this step.
Grab an ESXi image from My VMware. Make sure to grab an offline bundle (zip) and not an ISO.
Head to Menu > Auto Deploy > Software Depots > Import. Give the software depot a name and select the ESXi offline bundle downloaded earlier.
Head to Menu > Auto Deploy > Deploy Rules > New Deploy Rule. This is how we can restrict which hosts get which configuration. You could have rules that use different / custom versions of ESXi if you have hosts from multiple vendors, for example.
Give the rule a name and select to apply to All hosts or Hosts that match the following pattern. Anything from a MAC address to serial number can be matched. Multiple patterns for a single rule are also possible. I dedicated a subnet to identical hosts so will keep things open for now and selected All hosts.
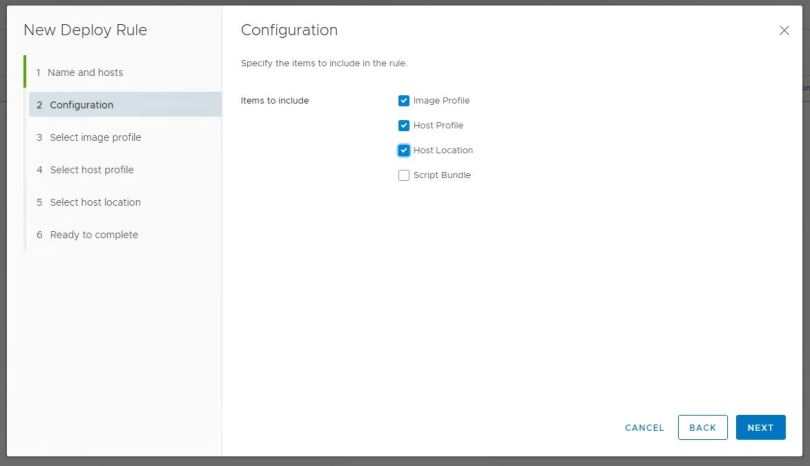
Select items to include. Note that to use the Host Profile and Host Location options, you must have a valid host profile and datacenter in place before running this wizard
Select the software depot and image created in the previous step. Select host profiles and a host location if appropriate
Creating the rule will take a short while- don’t panic. Once complete, the rule is inactive. Select Activate/Deactivate Rule, select the previously created rule, then Activate.
At this stage you’ll need to setup DHCP. I setup reservations for all hosts, this way hosts are reconnected in inventory rather than being left with hosts in a disconnected state post restart, should a host get a different address when renewing its lease. The important thing is that option 66 is set and points towards your TFTP server and that option 67 is set to the name of the NBP- undionly.kpxe.vmw-hardwired.
Every time a host is shutdown or powered off it will lose all configuration and return to being a bare metal box. This may be desirable but if not, Stateless Caching and Stateful Installs may be your thing- I’ll cover these in a seperate post.
With all of the above in place, power on a host, make sure boot from network is an option and watch the magic happen.


